
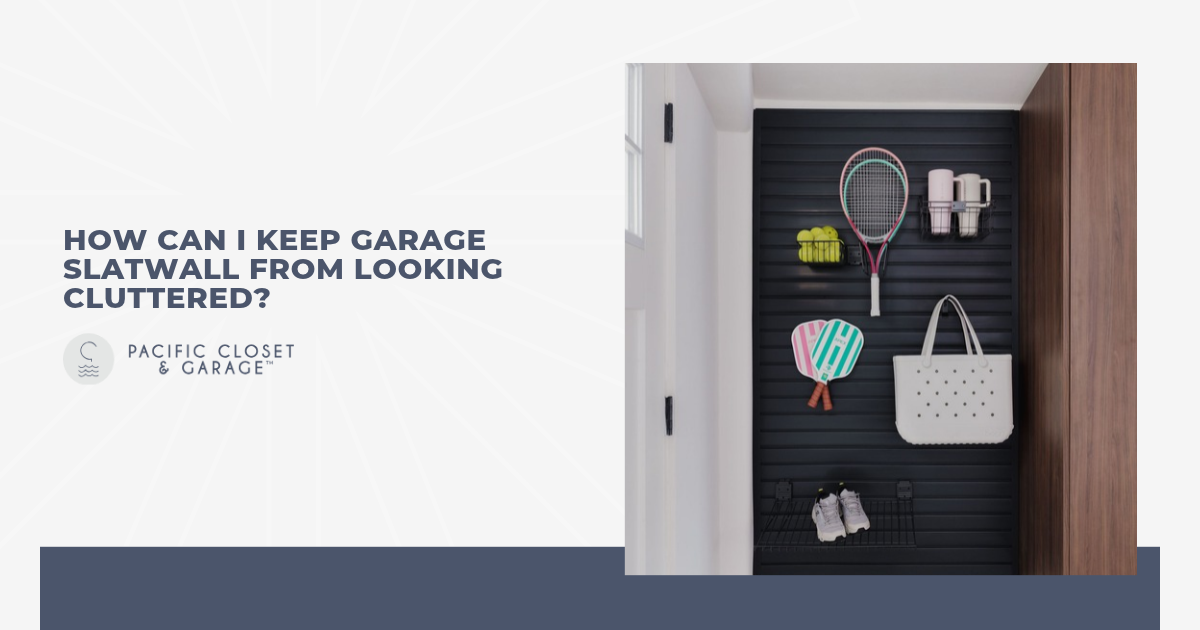
Your garage slatwall goes up and suddenly it feels like the answer to all your storage problems. But a few months later, the panels can start to look like a crowded bulletin board covered in hooks, cords, and half-forgotten tools. I've seen this happen in many garages, and the cause is rarely the panels themselves but how items get added one at a time without any real plan.
The good news is that keeping your slatwall from looking cluttered isn't as complicated as it might seem. It really comes down to being intentional about what goes on the wall and how it's arranged. Group similar items into clear zones, hang the things you grab most at eye level, and keep small loose pieces into bins or baskets so they don't spill across the panels. When your gear has a clear home and some breathing room, the whole setup starts looking organized.
No need for a full garage makeover to get your wall back under control. Here's what we'll cover to keep your garage slatwall clean, calm, and easy to use:
- Group items by category and activity
- Create clear zones across your wall
- Put everyday items at eye level
- Choose the right accessories for the job
- Use bins, baskets, and cabinets to hide small stuff
- Leave breathing room between items
- Avoid overloading your panels
- Label everything for easy upkeep
Keep reading to see how each tip helps your garage slatwall look cleaner, hold more gear, and save you a few minutes on every trip to the garage.
Group Items by Category and Activity
Clutter on a wall usually starts when tools get hung wherever there's an open slot. Gardening gloves end up next to a socket set, and the bike pump lands beside a paint roller. Your eye can't find a pattern, so even a tidy wall reads as messy. Once you sort by category, each item gets a logical neighbor, and your garage slatwall becomes much easier to scan.
Try sorting your gear into a few broad families first, such as:
- Yard and Garden: Rakes, shovels, pruners, and hoses belong together since you'll usually reach for them during the same chore. Keep them near the garage door so dirt and debris stay close to the exit instead of tracking across the floor.
- Sports and Recreation: Balls, helmets, rackets, and bike gear make a natural group, especially when they all head out the door for the same weekend plans. Store them together so everyone knows exactly where to return things after practice or a ride.
- Tools and Hardware: Drills, hammers, tape measures, and fastener bins work best in one dedicated cluster near your workbench. You'll finish small repairs faster when you're not walking across the garage to find the right screwdriver that wandered off.
I like to take grouping a step further by organizing around activities, not just item types. Your car wash supplies might include a bucket, sponges, microfiber towels, and a hose nozzle. They fall into different categories, but you use them at the same time. Store them as one set, and you'll grab a single kit instead of searching three spots.
Create Clear Zones Across Your Wall
Once your items are grouped, give each group its own section of the wall. I usually tell clients to think of their garage slatwall as a set of neighborhoods, each with clear borders. Garden tools live in one stretch, sports gear in another, and car care in a third. Your brain picks up on those boundaries fast, and the wall starts to look organized even when it's full.
Location matters as much as the zones themselves. Put the yard zone closest to the big door, the workshop zone beside your bench, and household overflow near the entry to the house. You'll cut down on steps, and items are more likely to go back where they belong when their home sits along a natural path. Zones placed at random tend to break down within weeks because returning things feels like a chore.
Visual cues help each zone hold its shape. Shelves in one area and hooks in the next create a natural break your eye can follow. Some people also run a contrasting accent strip between sections for an even cleaner split. Small touches like these stop gear from creeping across borders over time.
Put Everyday Items At Eye Level
Your wall's most valuable space sits roughly between your waist and shoulders. Items in that band are the easiest to see, grab, and put back without bending or stretching. When daily-use gear lives up high or down low, it tends to get left on the workbench or floor instead. Over time, those strays are what make the whole wall look chaotic.
Think of your wall in three height bands, each with its own job:
- Eye Level for Daily Gear: Reserve this band for the tape measure, dog leash, work gloves, and anything else you reach for several times a week. Quick access here means fewer items left lying around simply because putting them back felt inconvenient.
- Upper Band for Occasional Items: Holiday decorations, spare paint, and camping gear can live higher on the wall since you'll only need them a few times a year. Sturdy shelves or bins work well up here because they keep bulky items contained.
- Lower Band for Heavy or Kid-Friendly Gear: Heavier items like bags of potting soil or a cordless leaf blower are safer stored low. It's also the perfect height for balls, scooters, and helmets so younger kids can grab and return their own things.
I also think it's worth walking your wall with everyone in the household in mind. Eye level for you might be out of reach for a shorter partner or a child. Adjust the heights so the people using each zone can reach their own gear comfortably. Slatwall makes these changes easy since accessories slide out and move without new holes in the wall.
Choose the Right Accessories for The Job
One of the most common mistakes I see is forcing each item onto a basic hook. When the hook is too short, garden hoses slip off and pile up on the floor. Too long, and a single wrench juts out awkwardly. Accessories sized for a specific item hold it securely and keep the overall look tidy.
Most garage gear fits one of these accessory types:
- Double Hooks and J-Hooks: These work well for extension cords, hoses, and ladders that need a wide, curved support. Pick a hook depth that matches the item so it sits flush against the panel instead of hanging off at an awkward angle.
- Lipped Shelves: Flat shelves with a raised front edge hold paint cans, spray bottles, and cleaning supplies that won't hang on their own. Its lip keeps bottles from sliding off when someone bumps the wall or slams the car door.
- Specialty Holders: Bike hooks, ball cages, and tool-specific racks for rakes or power tools give odd-shaped gear a secure home. They cost a bit more than generic hooks, but they hold items in place and make the wall look professionally planned.
Before you buy anything, measure your largest items and count how many of each type you own. Buy accessories based on that list rather than grabbing a variety pack, since unused hooks just add clutter. Quality matters too. Look for powder-coated steel pieces that lock firmly into the grooves and won't tip forward on your garage slatwall under weight.
Use Bins, Baskets, and Cabinets to Hide Small Stuff
Small loose items hurt a clean look more than anything else on the wall. Zip ties, sandpaper, batteries, and spare screws can turn a neat shelf into a jumble in no time. Even when each piece is useful, dozens of tiny objects create visual noise your eye can't ignore. Give them a container, and the whole wall calms down.
Clear or open-front bins work best for items you use often since you can spot what's inside without pulling anything down. Solid baskets are better for rags, sponges, and car wash mitts that don
Cabinets take concealment a step further. Wall-mounted cabinets that hang on your garage slatwall give you closed storage for chemicals, paints, and anything you'd rather keep away from kids. Doors instantly simplify the view, since a flat surface reads as clean even if the inside isn't perfect. Pair one or two cabinets with open accessories to get a balanced mix of display and hidden storage.
Leave Breathing Room Between Items
It's tempting to fill each open slot, but a packed wall looks crowded even when everything on it is organized. Negative space gives your eye a place to rest and makes individual items easier to pick out. Designers rely on the same principle in kitchens and living rooms, and it works just as well in the garage. Fewer items spread out will always look calmer than more items squeezed tight.
Keep the following spacing guidelines in mind:
- Space Around Each Item: Give hanging tools enough clearance that you can lift one off without knocking its neighbor. Two to four inches works for most hand tools, while bulkier gear like bikes or ladders needs more room on all sides.
- Gaps Between Zones: Wider gaps of 8 to 12 inches between categories act like visual borders. They make it obvious where one zone ends and the next begins, which helps everyone in the house return gear to the right spot.
- Open Space for Growth: Keep roughly 10 to 20 percent of your panels empty when you first set things up. New tools and hobbies will show up eventually, and spare room lets you add them without rearranging the whole wall.
I've found that clients who leave intentional gaps are far happier with their walls a year later. Open space looks deliberate, so the wall reads as designed rather than overflowing. If you're struggling to find room, it's usually a sign that some items belong in a cabinet, on a shelf, or out of the garage entirely.
Avoid Overloading Your Panels
Slatwall is strong, but it isn't limitless. Each panel and accessory has a weight rating, and pushing past it can cause hooks to sag, slip, or pull loose. Overloaded walls also look heavy and strained, with gear bunched up and drooping. Stay within those limits, and you'll protect both your gear and the clean look you're after.
I always recommend spreading heavy items across the wall rather than stacking them in one section. Bikes, power tool cases, and bags of salt or fertilizer put real strain on a single area, especially if the panels aren't anchored into studs. Spread out, they balance the load and keep any one zone from looking bottom-heavy. Check the rating on each accessory too, since a hook rated for 25 pounds won't safely hold a 40-pound ladder.
Installation plays a big role in what your garage slatwall can hold. Panels fastened into wall studs with proper hardware carry far more weight than ones attached to drywall alone. If you notice bowing, gaps between panels, or accessories tilting forward, take some weight off and have the installation checked. Small warning signs are easy to fix early and much harder to fix after a panel fails.
Label Everything for Easy Upkeep
Even a perfectly organized wall falls apart if nobody remembers where things go. Labels take the guesswork out of putting gear away, especially in a household where several people use the garage. They're also a quiet reminder that each item has a home, which makes it less likely to end up on the floor or workbench.
You can approach labeling in a few simple ways, including:
- Bin and Basket Labels: Stick a clear label on the front of each container so you can see what's inside before pulling it down. Printed waterproof labels hold up better than handwritten tape in a garage that swings between hot and cold.
- Zone Signs: Small signs at the top of each section, like "Garden" or "Car Care," make your layout obvious at a glance. They're especially helpful for guests, kids, or anyone who borrows a tool and isn't sure where to put it back.
- Tool Tags: Add small tags beneath each hook naming the tool that belongs there, or trace outlines for larger tools. Empty outlines show you right away when something's missing or loaned out, so nothing stays lost for long.
I'd suggest pairing labels with a quick monthly reset. Spend 10 minutes returning stray items, tossing broken ones, and adjusting labels when your needs change. Labels only work if they stay accurate, so update them whenever you swap gear in or out. Small habits like these keep your garage slatwall looking as sharp next year as it does the day you finish organizing it.
Conclusion
Most garages don't fail because of a lack of space. They fail because nothing ever had a real home to begin with. A well-planned garage slatwall fixes that at the root. I've seen it change how families actually use the space, not just how it looks on a good day. Tools get put back. Kids find their own gear. Weekend projects start without a 20-minute search first. None of that requires a big budget or a full renovation. It just takes a setup that was thought through once, so you don't have to think about it again.
